Back


CONVERTING A GARAGE INTO A HOME OFFICE/STUDIO

CATEGORIES: garage, conversion, office


With the opportunity to build a garden studio for myself long gone, I set my sights on converting a garage; half of which will soon be made redundant, making it the perfect time to finally get my own small studio space...


NOTE: Click/tap on images with a green border to expand them into a lightbox; then click/tap anywhere again to close.

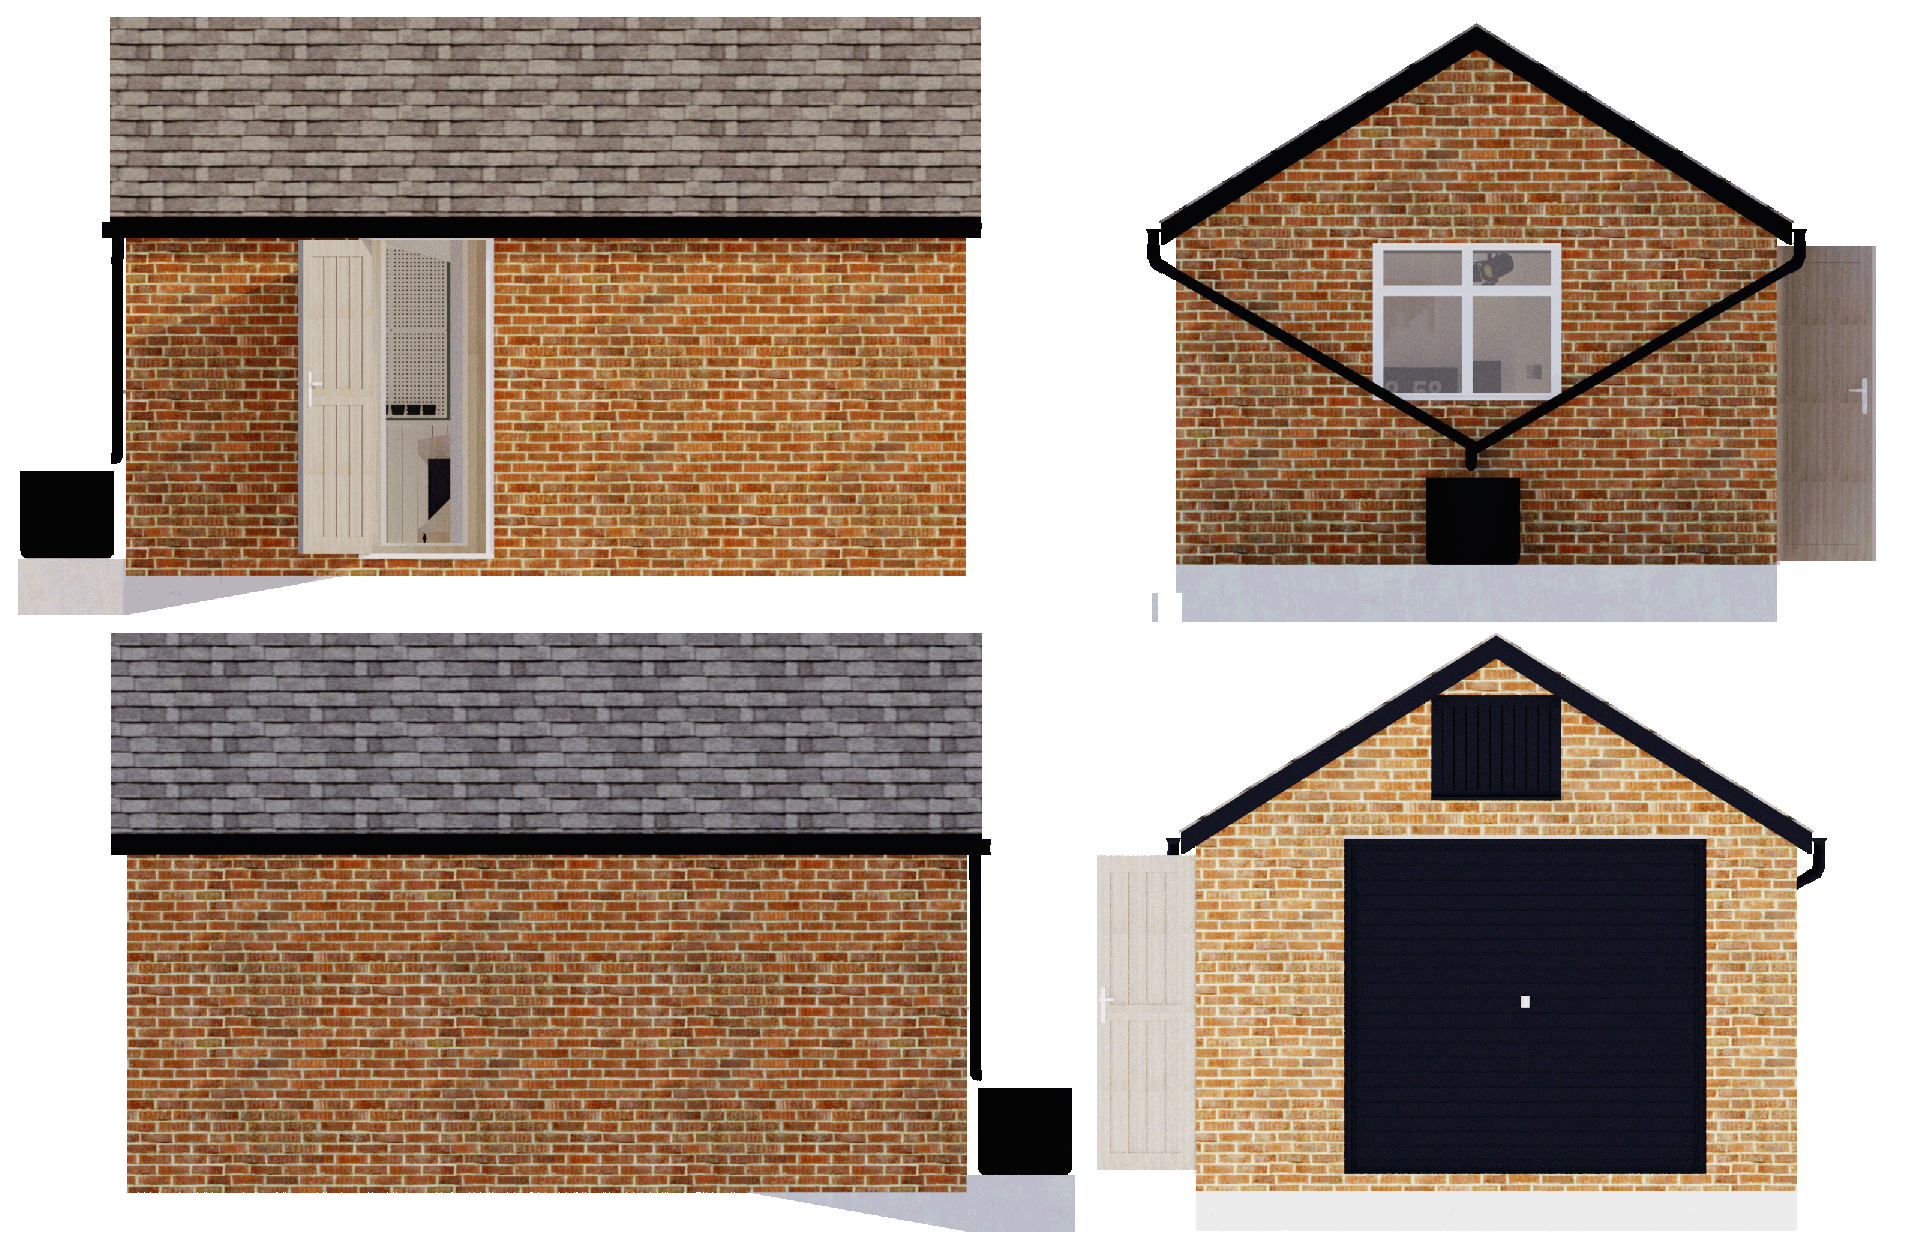
Garage elevations
CONSTRAINTS AND SOLUTIONS:
CONSTRAINTS:

  •  Half of the garage (nearest the up-and-over door) must be left as-is for storage purposes and ease of access for larger objects
  •  The minimum length for the unconverted section is 2.1m
  •  Access via the side door must be left as-is, and ideally the unconverted section can be accessed this way without having to go through the studio
  •  Similarly, the studio should have its own lockable door for security, heat/sound insulation, and privacy reasons
  •  No additional openings can be made, nor any made larger
  •  Ceiling height is relatively low, and cannot be raised
  •  The wall is only single skin brick, and contains pillars in the rear corners, and also half way along the side walls
  •  There is no insulation present at all
  •  The current wooden window has rotten out on the bottom, and is only single glazed

SOLUTIONS:

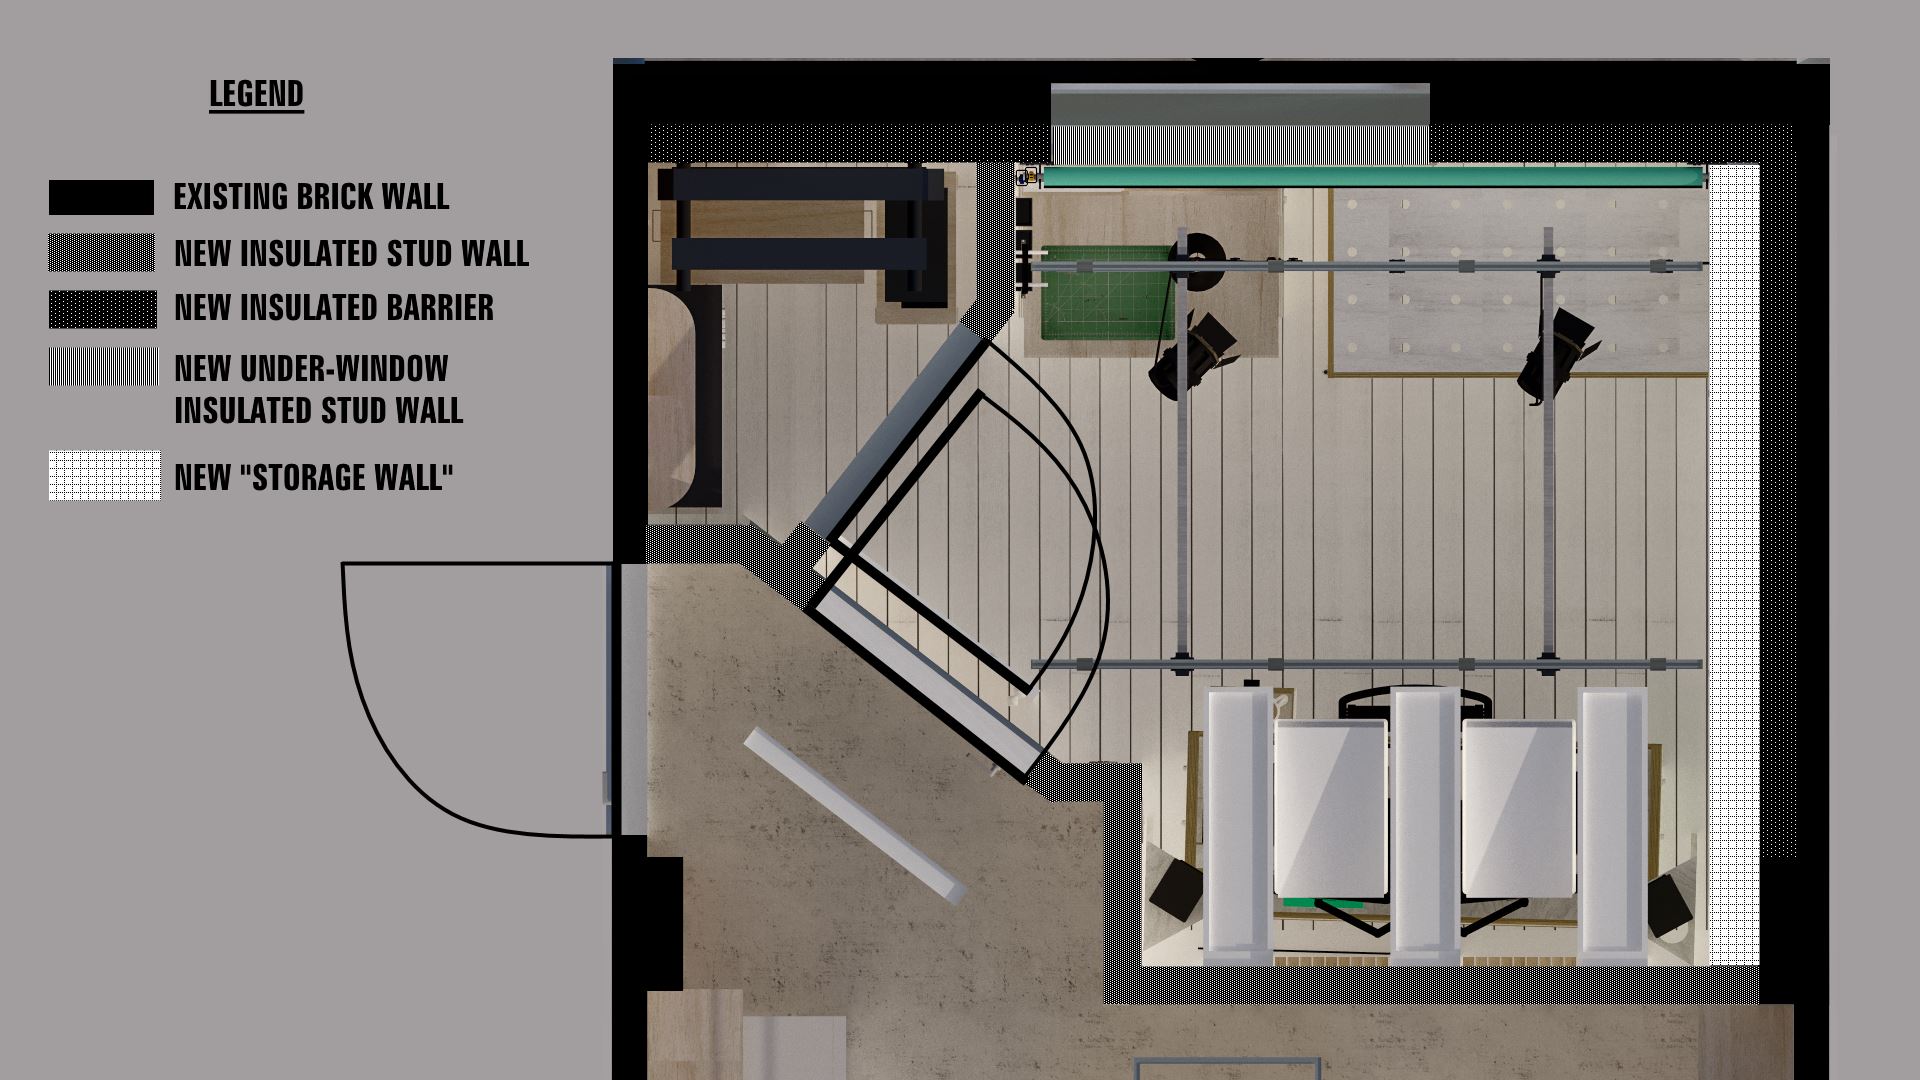
  •  A new insulated stud wall will go up roughly halfway along the inside, then dogleg back towards the side door to allow access to both areas independently
  •  To provide heat and sound insulation, a new raised floor will be added on top of the existing concrete with insulation batts within
  •  Similarly, the walls between pillars will also receive new studwork, complete with insulation batts
  •  Insulation will also be added between the joists above, and a ply ceiling added
  •  The existing (and only) window will be replaced with a more energy efficient one
  •  Acoustic panels will be constructed above the desk to control harsh early sound reflections
THE PLAN:
DESIGN POINTS:

  •  A workbench that can either be moved out of the room, or folded into the wall, if more space is required
  •  Similarly, a folding model-making bench for when I need to work on commissions
  •  A wide photography backscene with multiple paper/vinyl rolls that can be lowered/raised
  •  Preferably a ceiling-mounted lighting track, with rails on rollers for maximum flexibility
  •  A small section of wall-mounted pegboard complete with storage bins
  •  A separate cupboard for the storage of my model railway layouts and modelmaking items
  •  Acoustic absorption around and above the composers desk
  •  Above all, a flexible space that can be used for a variety of hobbies, work, and interests

The floorplan shows how much studio space is lost thanks to the existing entry door (that cannot be moved).

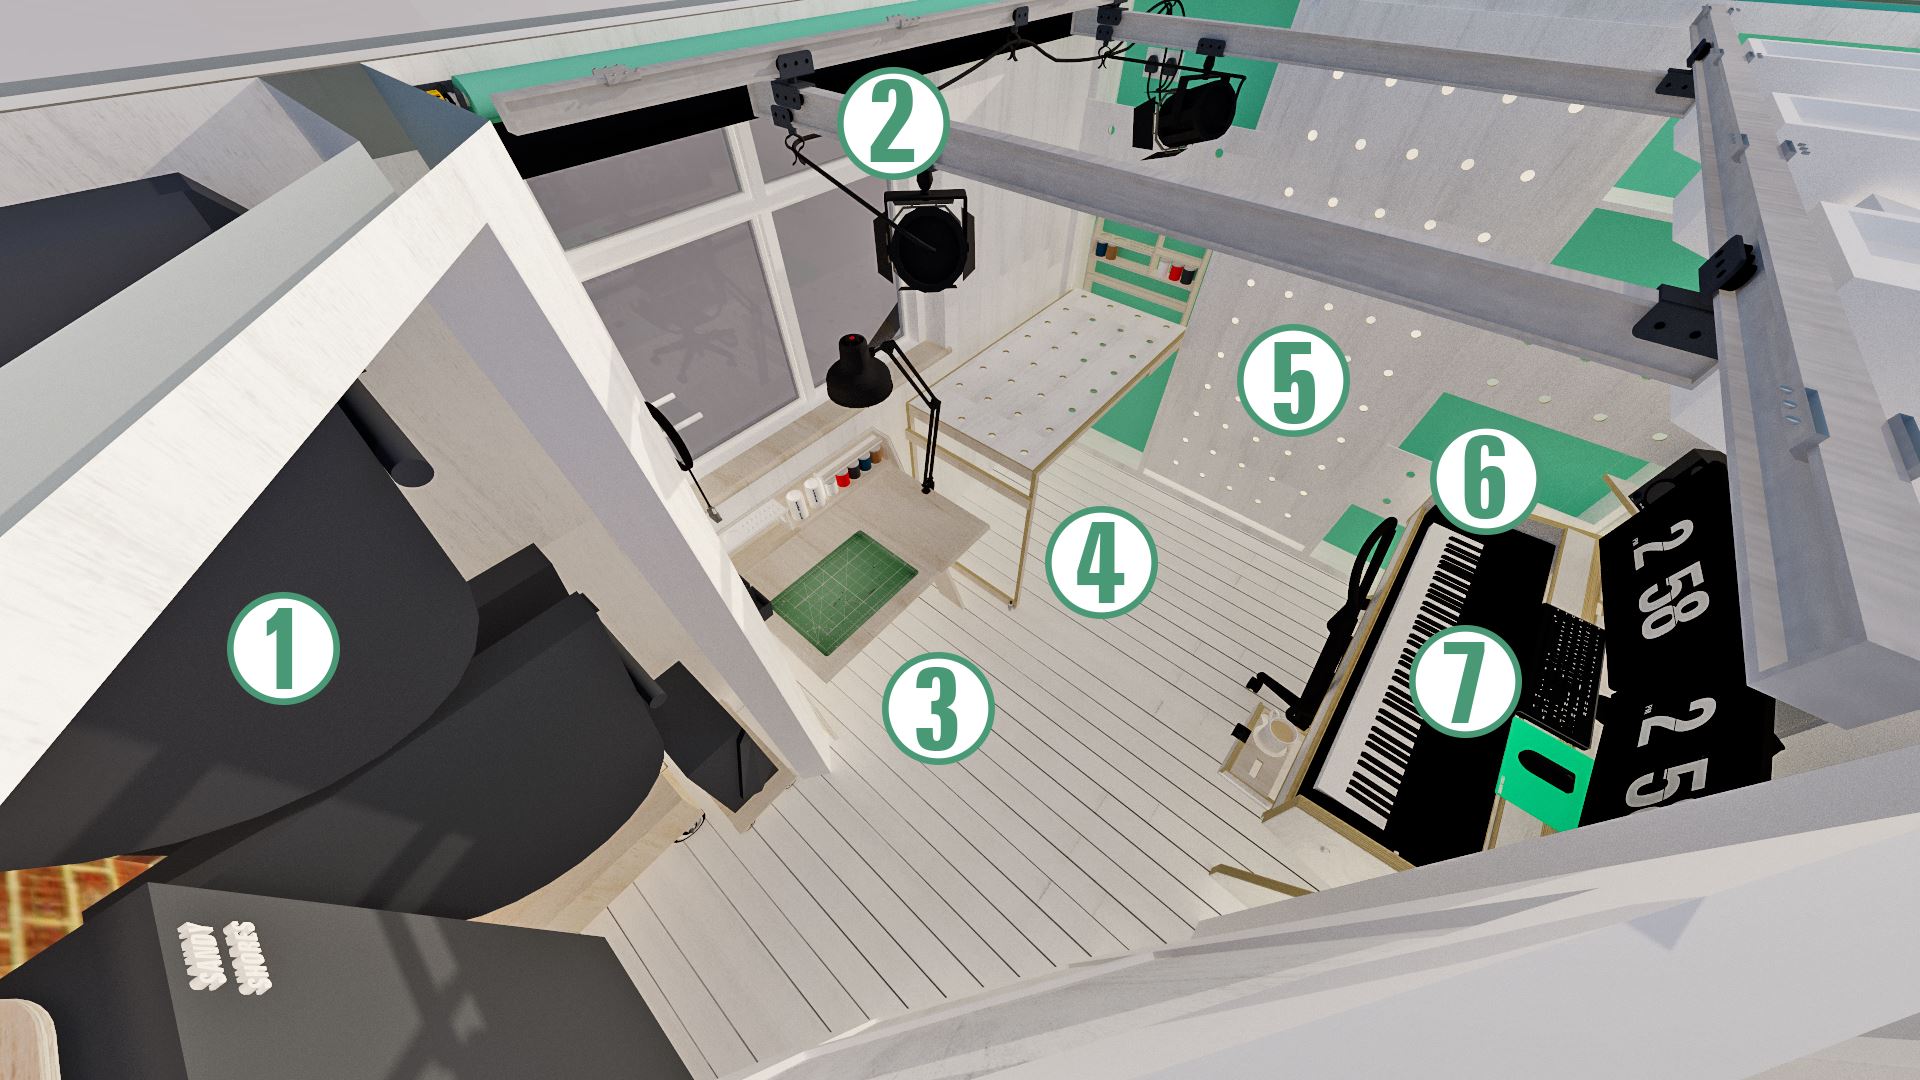
Click render below for annotations:

An overview, showing how the main features fit into the small space. 1 - Layout Storage/Machine Room, 2 - Lighting Gantry, 3 - Modelmaking Desk, 4 - Modelmaking/Photography Bench, 5 - Drop-down Bed or Tool Rack, 6 - Shelving and Storage, 7 - Composer's Desk.
STORAGE:
I have two model railways which have long needed a proper place to be stored. The multi-board layout will be stored on these metal 'spikes' that are bolted to the wall, and the other sits upright in a specially-made box.

Models & Layouts

Although slightly wider than a single garage, there is still limited space to dedicate to storage; mostly because of the location of the existing door which takes up a significant chunk of space. My main priority was to have somewhere to store my two model railways. My almost finished one will be stored upright in a purpose-built ply box, along the rear wall. The under-construction layout is made of 4 boards; a central triangular one, and 3 identical curved wedge shapes. These unusual shapes actually turned out to be blessing when considering storage options; as all they would require are wall mounted heavy-duty metal poles. In a stroke of luck, the 4 boards fit perfectly into the allocated space; with just enough ceiling height and width in the cupboard to stack them vertically on those metal arms.

I've also included a small trolley which can contain small objects like transformers and controllers, as well as two shelves for other small items. Sadly there is no room left over for the layout legs/supports, nor any modelmaking tools and supplies, although these could now be stored in my room now that I can move most of my stuff into the garage. In any case, there's plenty of room underneath the workbench for tools and paints etc.

The PC

One thing you may notice is that my PC is also located in here, on a simply castor base. I haven't yet worked out the specifics of this, but my plan is also to use this cupboard as a "machine room"; a room where my PC is kept so that when it is working hard, the sound of the fans will not interupt or ruin recordings. My current idea is a series of wall-mounted sockets with VGA, HDMI, and multiple USB connections; one in the cupboard, and one behind the desk. These will likely be wired in special cable runs under the floor, which can be lifted off for ease of access. Again, specifics are unclear, but I'm desperate to have a quiet workstation!
There are various storage sections partially hidden on the back wall; they range from simple shelves at the top, to
The large central section of the back wall could be one of three things, depending on your needs; either a large absoption acoustic panel, an openable tool rack, or a drop-down small single day bed. I've shown the bed option, which simply folds down on hinges, with additional legs to support the end.
A view looking towards the new studio from the unconverted half of the garage. Note how much storage space there is here; various shelves and worktops leave plenty of space for not only storing the usual stuff, but also for working on messy projects.
DESK AREA:
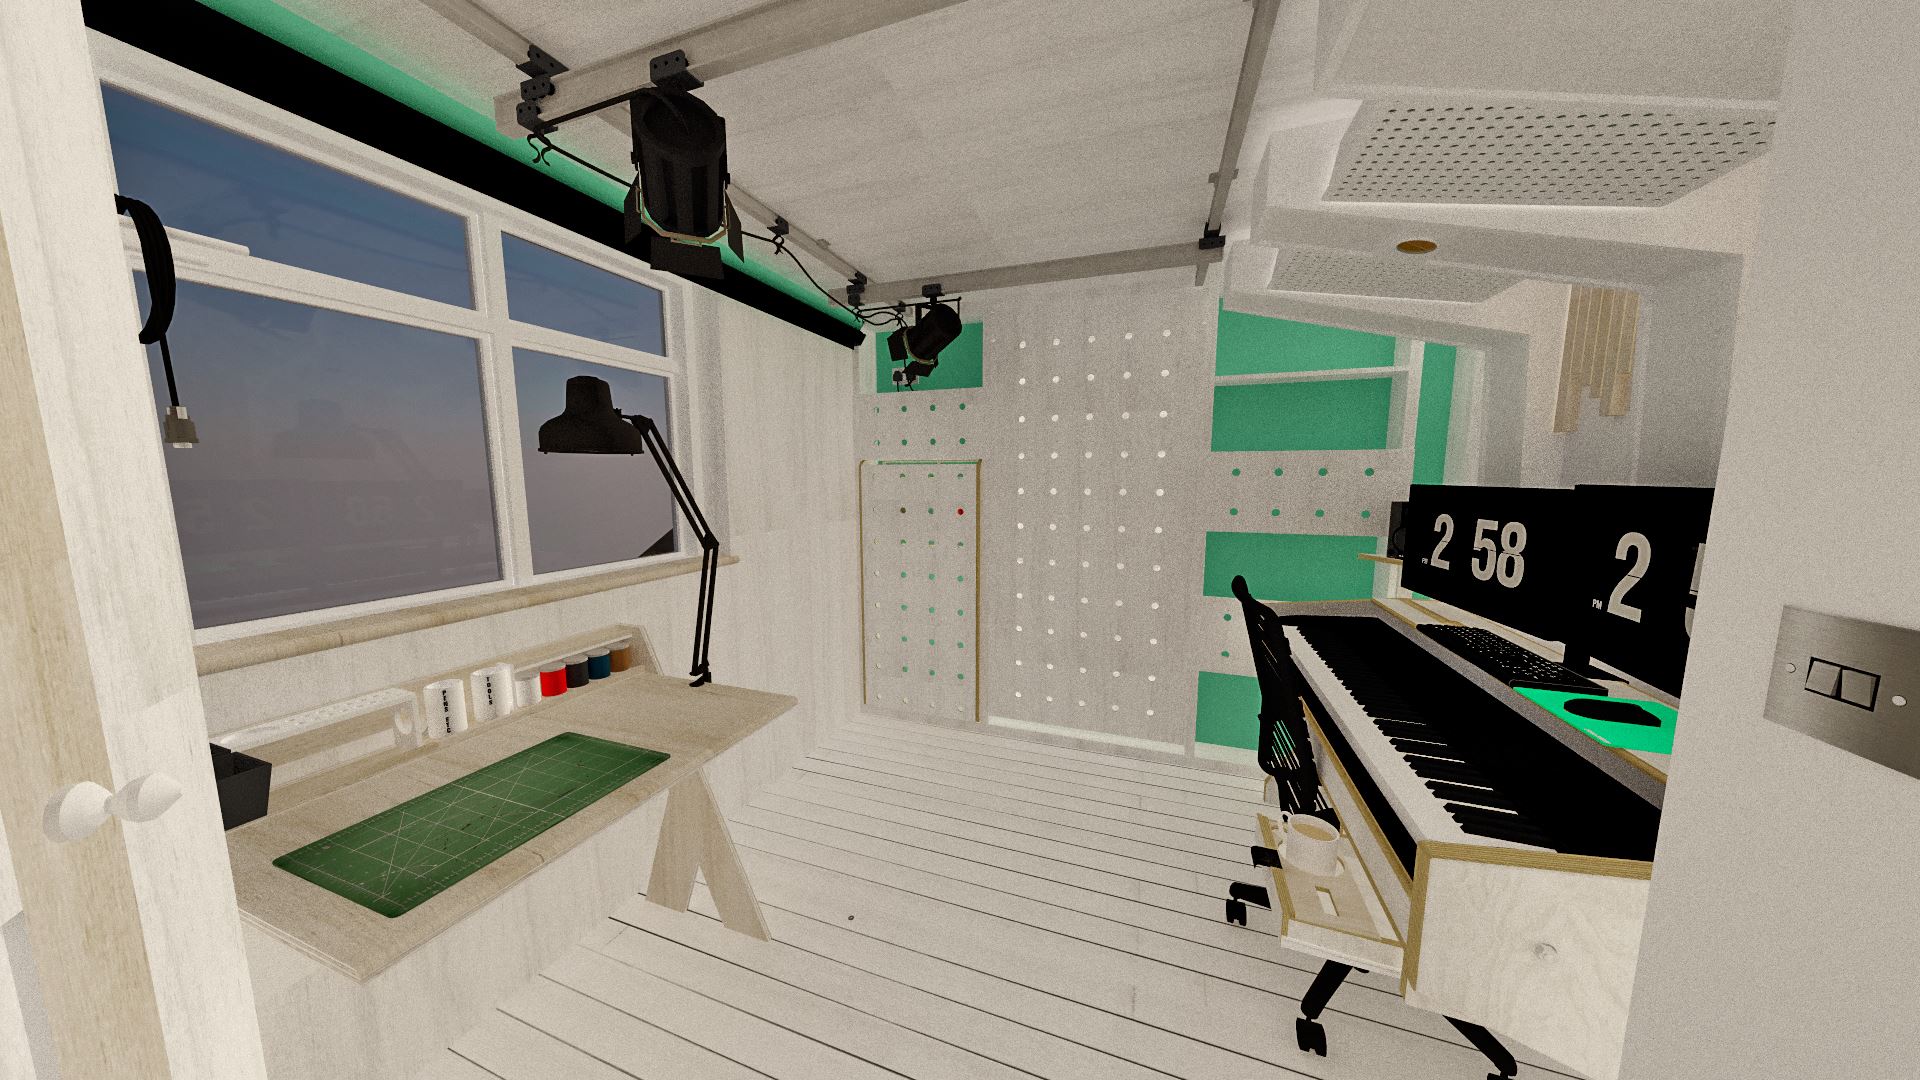
The interesting overhead acoustic panels are shown to good effect here, as are the neat yet simple decorative softwood batten slats behind the computer monitors; made to represent sound waves. Note how I'll have a good sight line looking out of the garage, and will be able to let fresh air in during the warm summer months.

The Composer's Desk

The desk (still unbuilt after 3 years, but hopefully work will resume on it this month) has not changed much since the last version. The only changes were made to, firstly, the rear left storage section (which now has less depth to accomodate plugs which fit into the extension lead below "upside-down"), and secondly, the rolling storage unit, which has been removed entirely, and a slim pull-out drawer added underneath the desk instead.

The overhead structure actually comprises of a mix of absorption and lightly reflective sound treatment. The perforated panels have Rockwool sat behind, whilst the shorter sections that also reach behind the desk and down to the floor are fabric-covered Rockwool panels; with frames likely made from either 18mm ply or MDF . Note the single built-in can light, which can be controlled from the switch by the door.
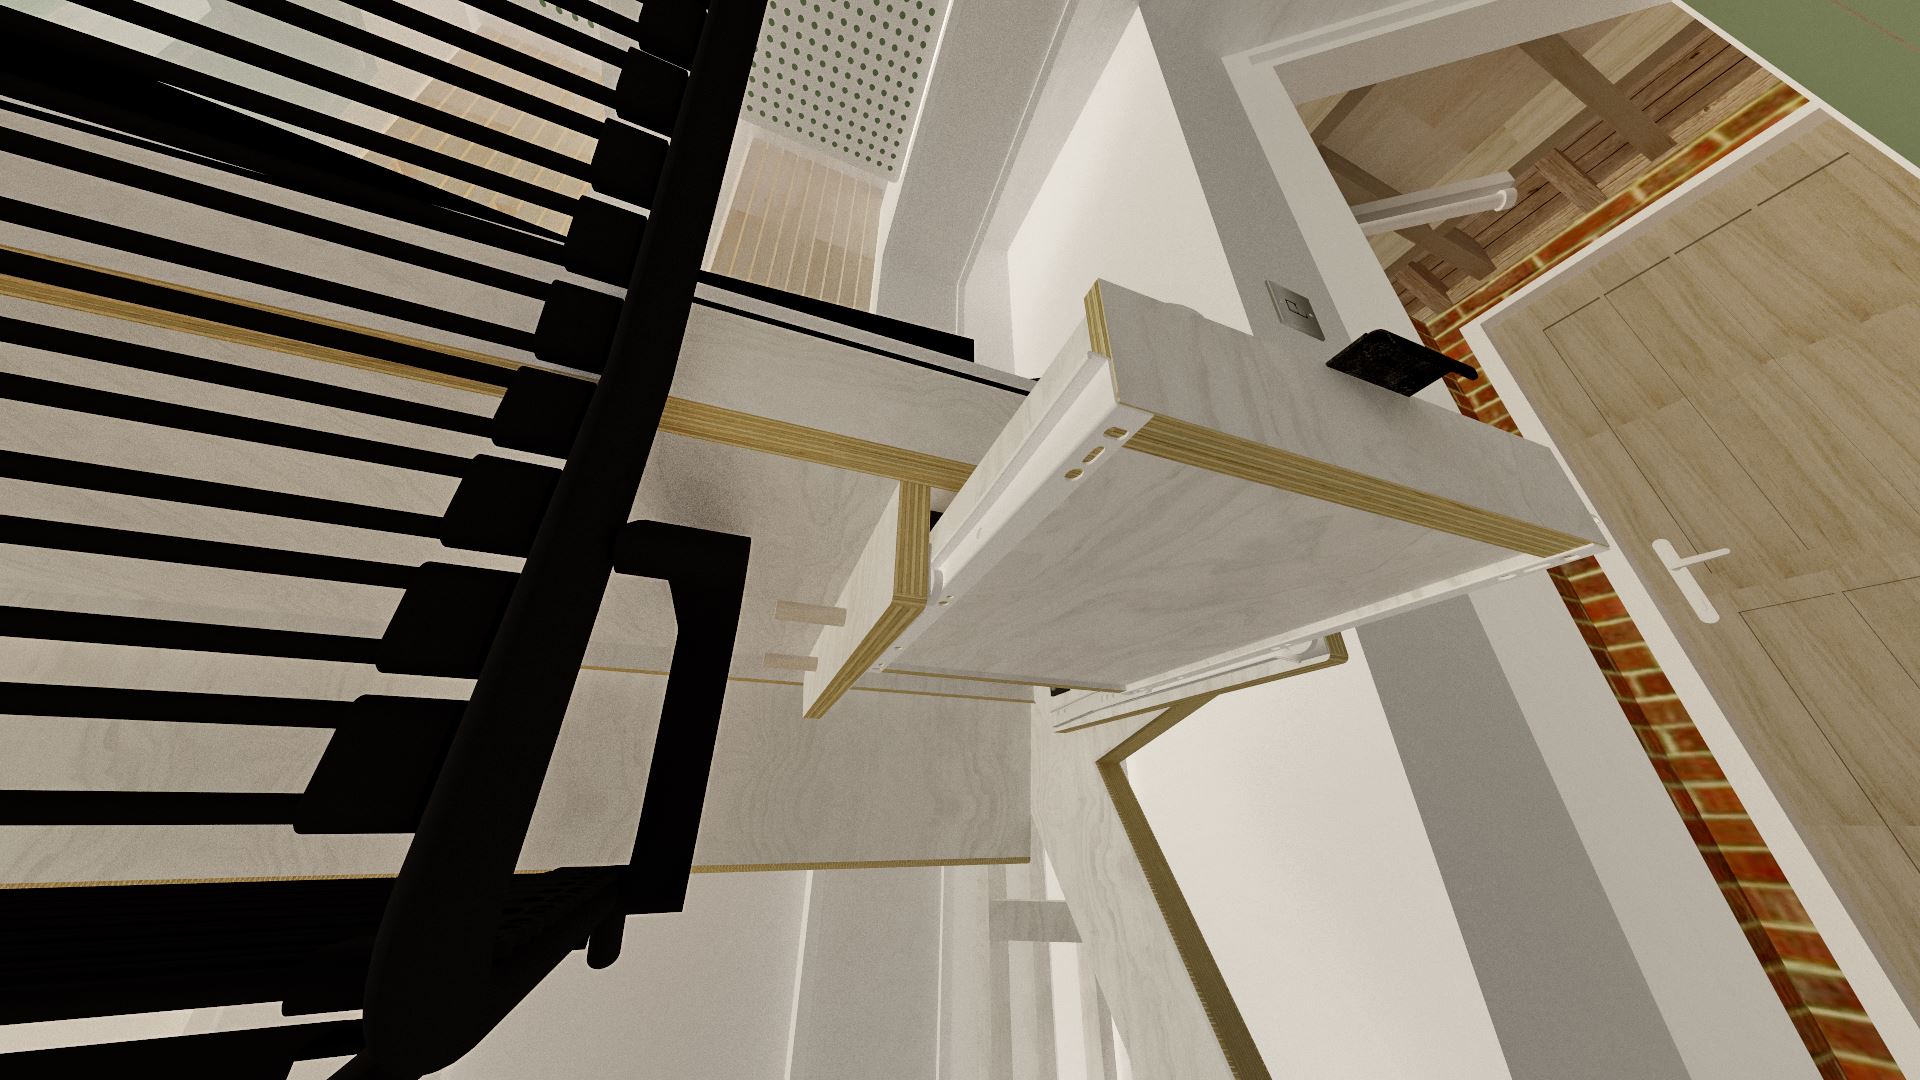
A close-up of the drawer; it's supported on drawer runners that I've had for many years, but not yet found a use for! It replaces the rolling drawer unit that was planned.
The studio floor here is actually raised by 100mm, and sits on a brand new wooden, insulated sub-floor. The idea was to provide a warmer floor than the existing concrete slab. Fortunately, I actually like low ceilings, and as you can see, headroom is limited to about 2m throughout the entire studio; and lower under the lighting gantry and overhead acoustic panels.
MODELMAKING & PHOTOGRAPHY AREA:
Space is tight, so the key in this area was to make use of collapsible/moveable furniture. Yep, that means more furniture that I have designed, and will need to build! My original plan <strong>(1)</strong> shows a rolling workbench, whereas the final plan <strong>(2)</strong> shows the fold up/down slender, yet sturdy, bench.

The Workbench

The crucial, and dare I say smart feature of this project, actually lies partially hidden on the back wall. This wall contains not only storage space for a variety of objects, but also has fold-down furniture. The first of which is a workbench for my larger pieces of modelmaking. As I'm unlikely to need this all of the time, it wouldn't make much sense to keep such a large piece of furniture permanently located in this small room. My original plan was to have a large bench on castor wheels (1) that I could roll in and roll out whenever required. Whilst this would allow extra storage, and offers a more versatile solution, not only is there a step up to this new room, but access is tight, and there is no guarantee that there will be enough room in the remainder of the garage to temporarily store the workbench.

In the end I decided a drop down bench (2) would be a more convenient and space-saving option. In order for it to fold flat against the wall, the legs fold up into the frame. The bench is longer than the bench working height, so the whole lot needs to raise higher when in the folded position so that it fits against the wall. In order to do this, a channel needs to be routed into the side of the supporting framework in the shape of a candy cane; the bench can then be lifted up, and pushed back to sit in a round supporting notch; ready to then swing down 90 degrees. Easier to show than to explain! In any case, on the wall between the supporting frames, there is just enough storage for some small paint pot/modelmaking tool shelves.

Folding Model-making Desk

To the left of the workbench is the folding modelmaking desk. I'm really looking to simplify this as much as I can in the hope that I can build it quickly, and easily. The premise is simple; a slot running down each leg allows you to lift and then drop the work surface, which then stops swinging back too far by the crossbrace between the legs. In reverse, the surface can be lifted slightly more than 90 degrees, then pushed back to sit in a lowered slot. The work surface is held in place by the rear paint/tool shelf. Easier to show than to explain; so take a look at the renders below.
Folding the model-making bench is a 4 step process. First we have the bench secured to the floor <strong>(1)</strong>, the legs can then be folded up <strong>(2)</strong>, and the whole assembly lifed up 440mm <strong>(3)</strong>. Finally, it is pushed back 42mm into the supports <strong>(4)</strong>, and can then be carefully dropped down to sit flush with the wall. The bench and model-making desk are shown here ready to be put to use. The bench may look slender and delicate, but having cross-bracing and lockable bolts on the leg that slot into the floor make for a sturdy piece of furniture.

Lighting Gantry

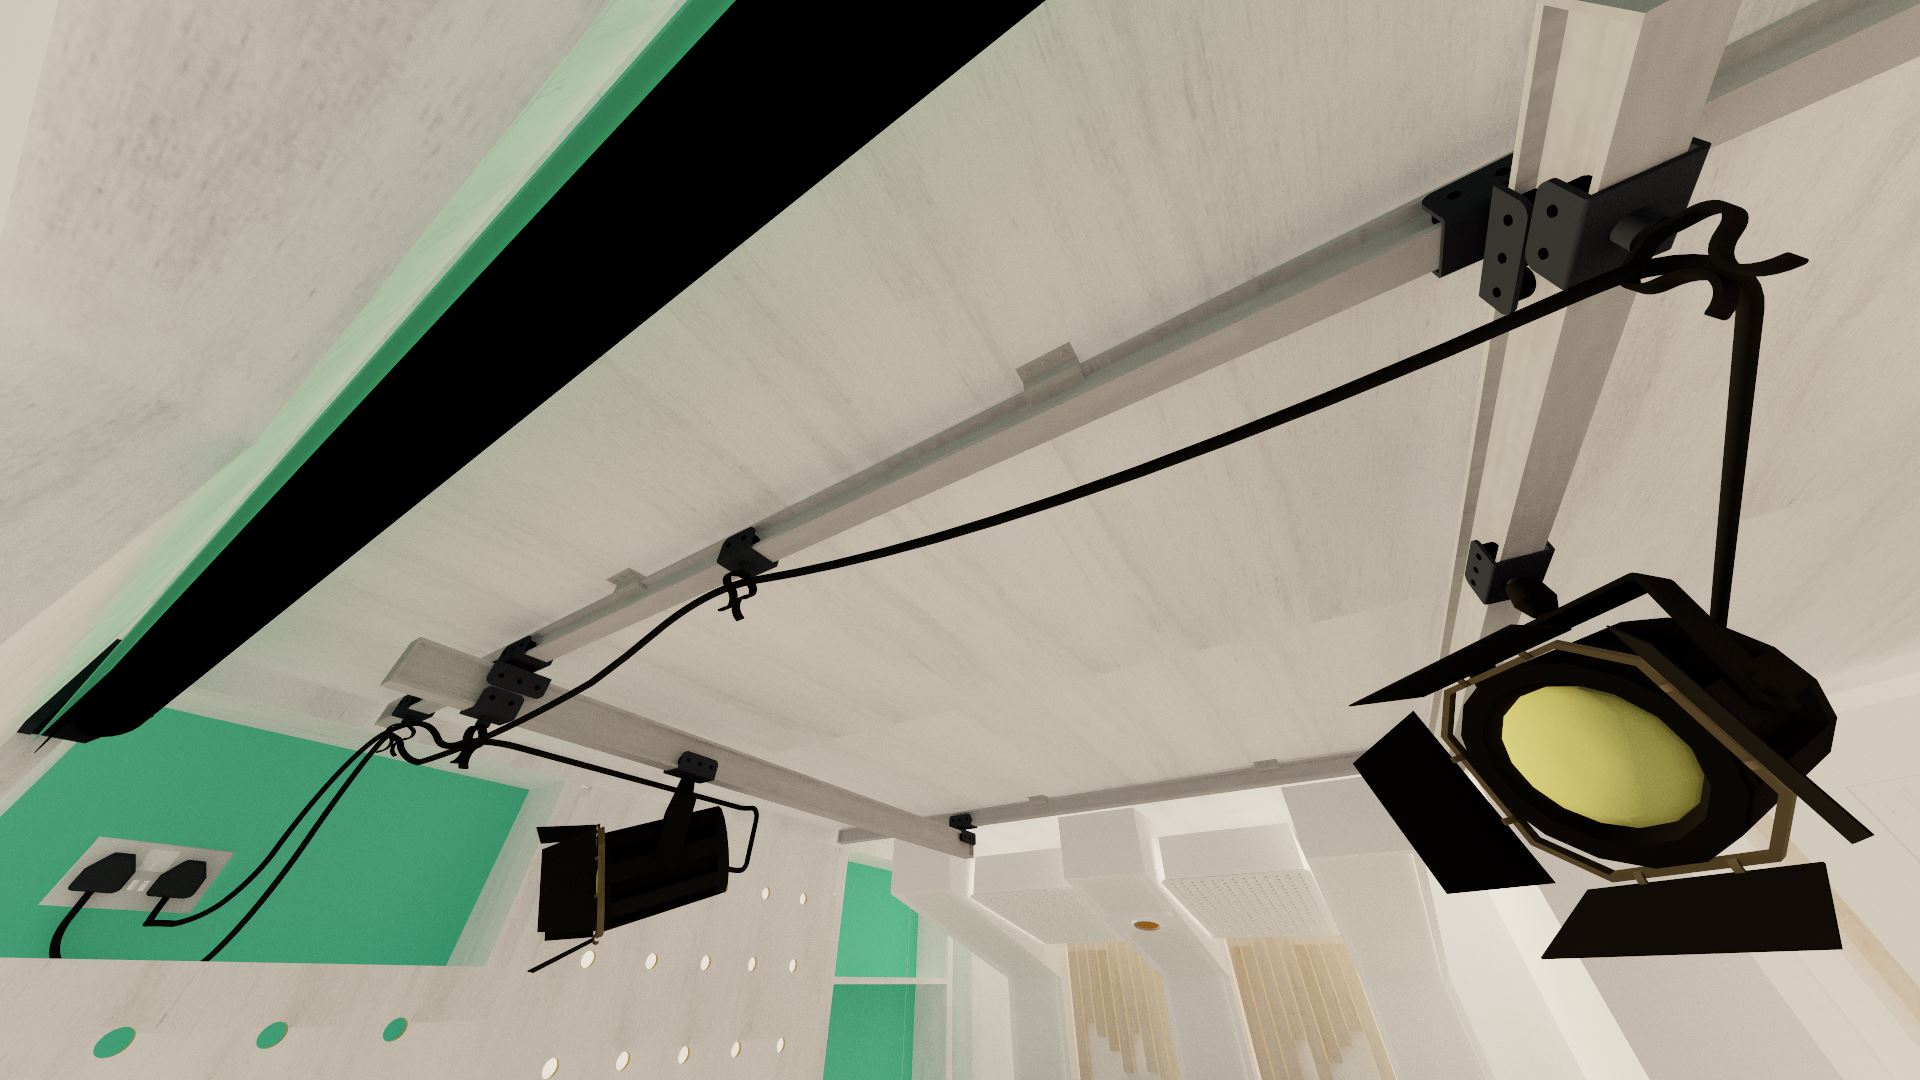
As I've been taking on commissions from modelmaking, it's dawned on me that a professional lighting set-up would be extremely beneficial; not only for the final product photos, but also as I tend to take photos during construction. Whilst daylight would be nice for this, it's easier to control high quality artificial studio lights, and get the light where you actually need it. As such, I've shown 2 such lights; fixed on travelling tracks suspended from the ceiling. In reality, one would be fine, with a secondary smaller portable light; but I decided that mounting everything on the ceiling means no cables to trip over, and no packing away would be required.

An improvement I could make would be to install one of the lights on a pantograph, so that it could also be lowered, although I feel that could be overkill on this; especially given the low ceiling height anyway, and the proximity of the adjustable lamp on the modelmaking desk. In any case, you'll see there is a plug socket high up on the wall; I'm hoping there is a way to turn this socket on/off by using one of the light switches on the wall as you enter the studio, although I've no idea if it's possible!
The lighting gantry is rigged up in a way that allows each light to traverse in 4 directions; so the light will always be where you need it. I've shown two professional level studio lights here, but one would probably be plenty.
The pegboard to the left of the window could be used to hold modelmaking tools, cables, or whatever else you can hang up. Alternatively, you could create shelving on top of the pegs for more generic storage.
A general view showing the model-making bench in its stored position. With a low headroom of 2m, it's easy to see how such a room may not be ideal for taller people; especially with the lights and gantry hanging down considerably! It would be a good idea to keep the lamps as close to the wall as possible when not in use, and also away from the middle drop-down wall section.
Looking from the model-making desk, we can see just how compact the studio is. The modern-looking acoustic structure above the desk not only looks cool, but servers to dampen the reflections of sound coming from the speakers (studio monitors). For a better effect, there ought to be some either side of the desk, too, but that would be easily solved with movable panels.
With both model-making work surfaces folded up, suddenly, the room looks a lot bigger! The holes in the floor that secure the fold-up bench in place can clearly be seen, and it's easy to see how it would be possible to turn this space into a small, professional photo studio, should you so wish!
Working our way around the space back towards the entrance door, it may seem odd to have a door on the storage area that can only be opened when the main door is shut, but it does help keep the noisy PC out of the studio space, and also keeps things looking tidy.
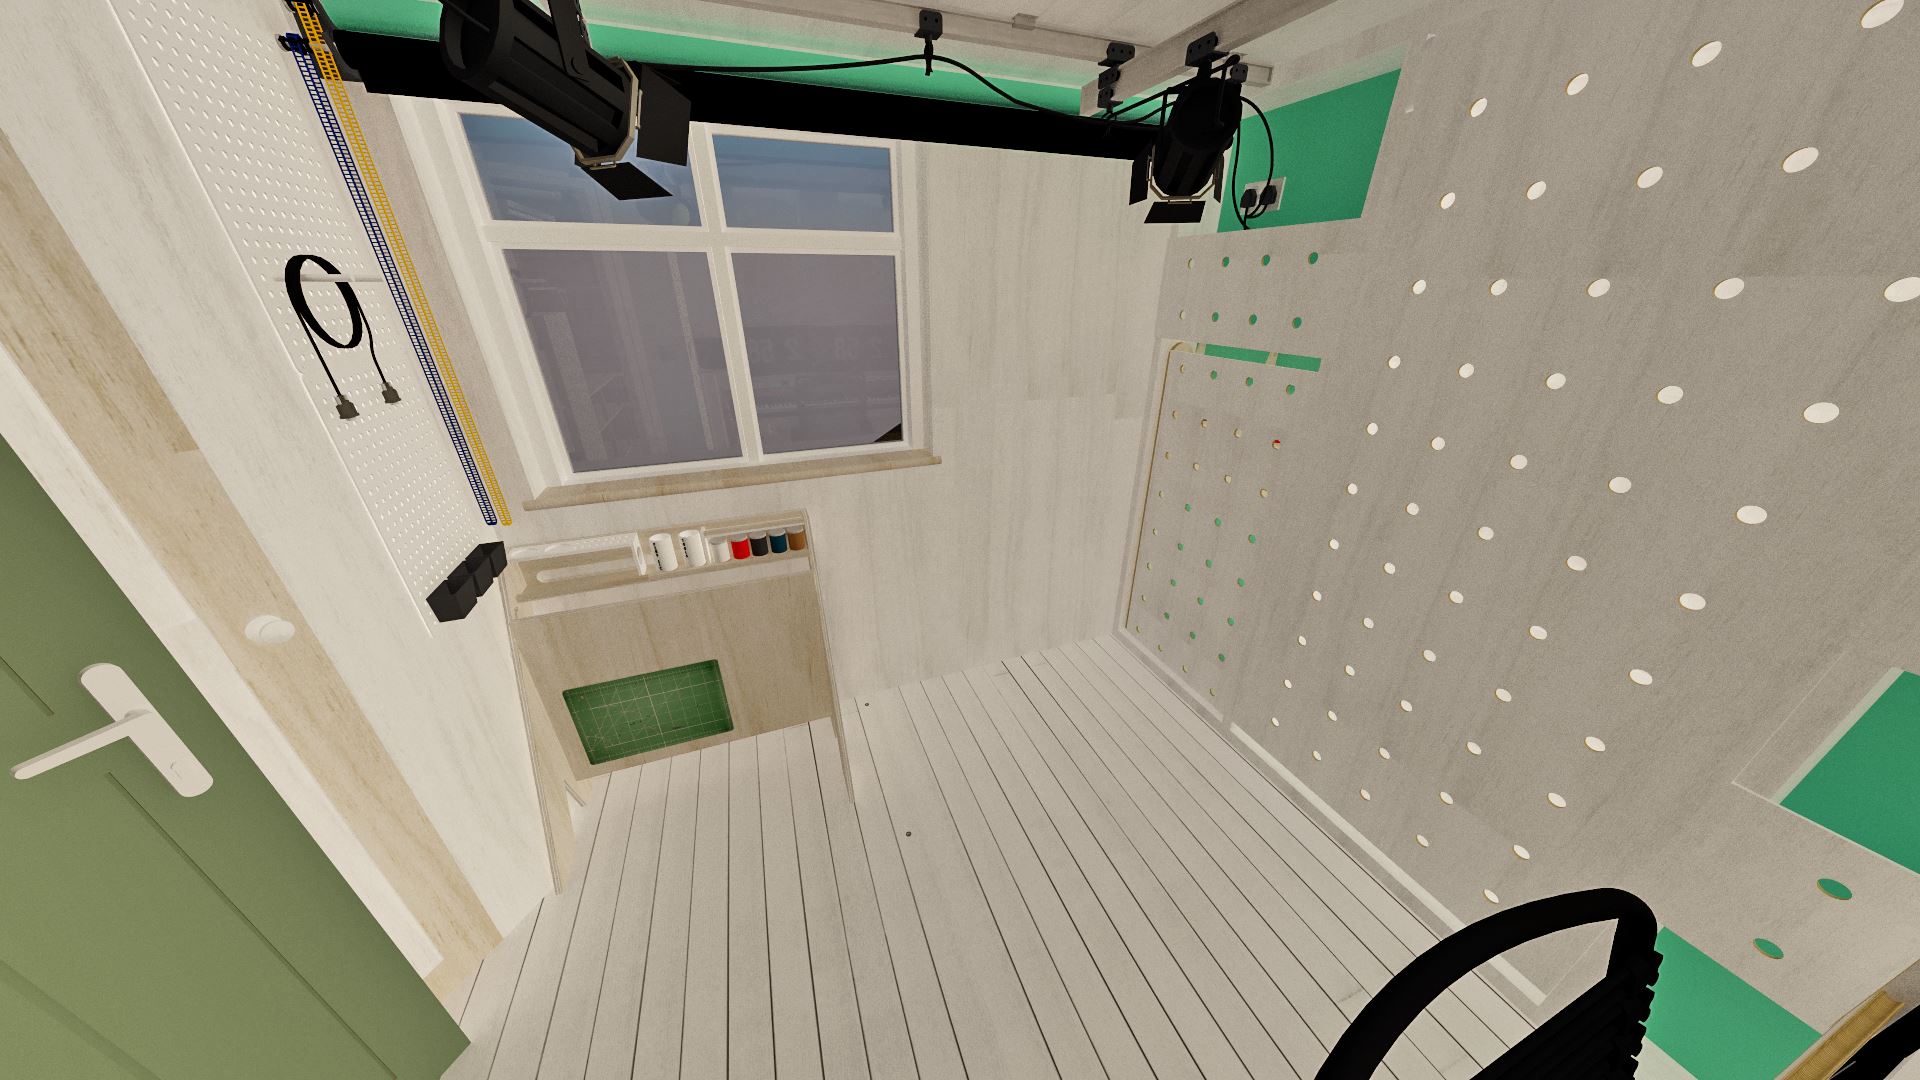
A higher view from between the two doors gives us a good overview; it's a small, but very functional and versatile space. The movable/folding furniture means there is plenty of room; in fact, you could even fit a nice comfy chair in when you don't need the large bench up.'
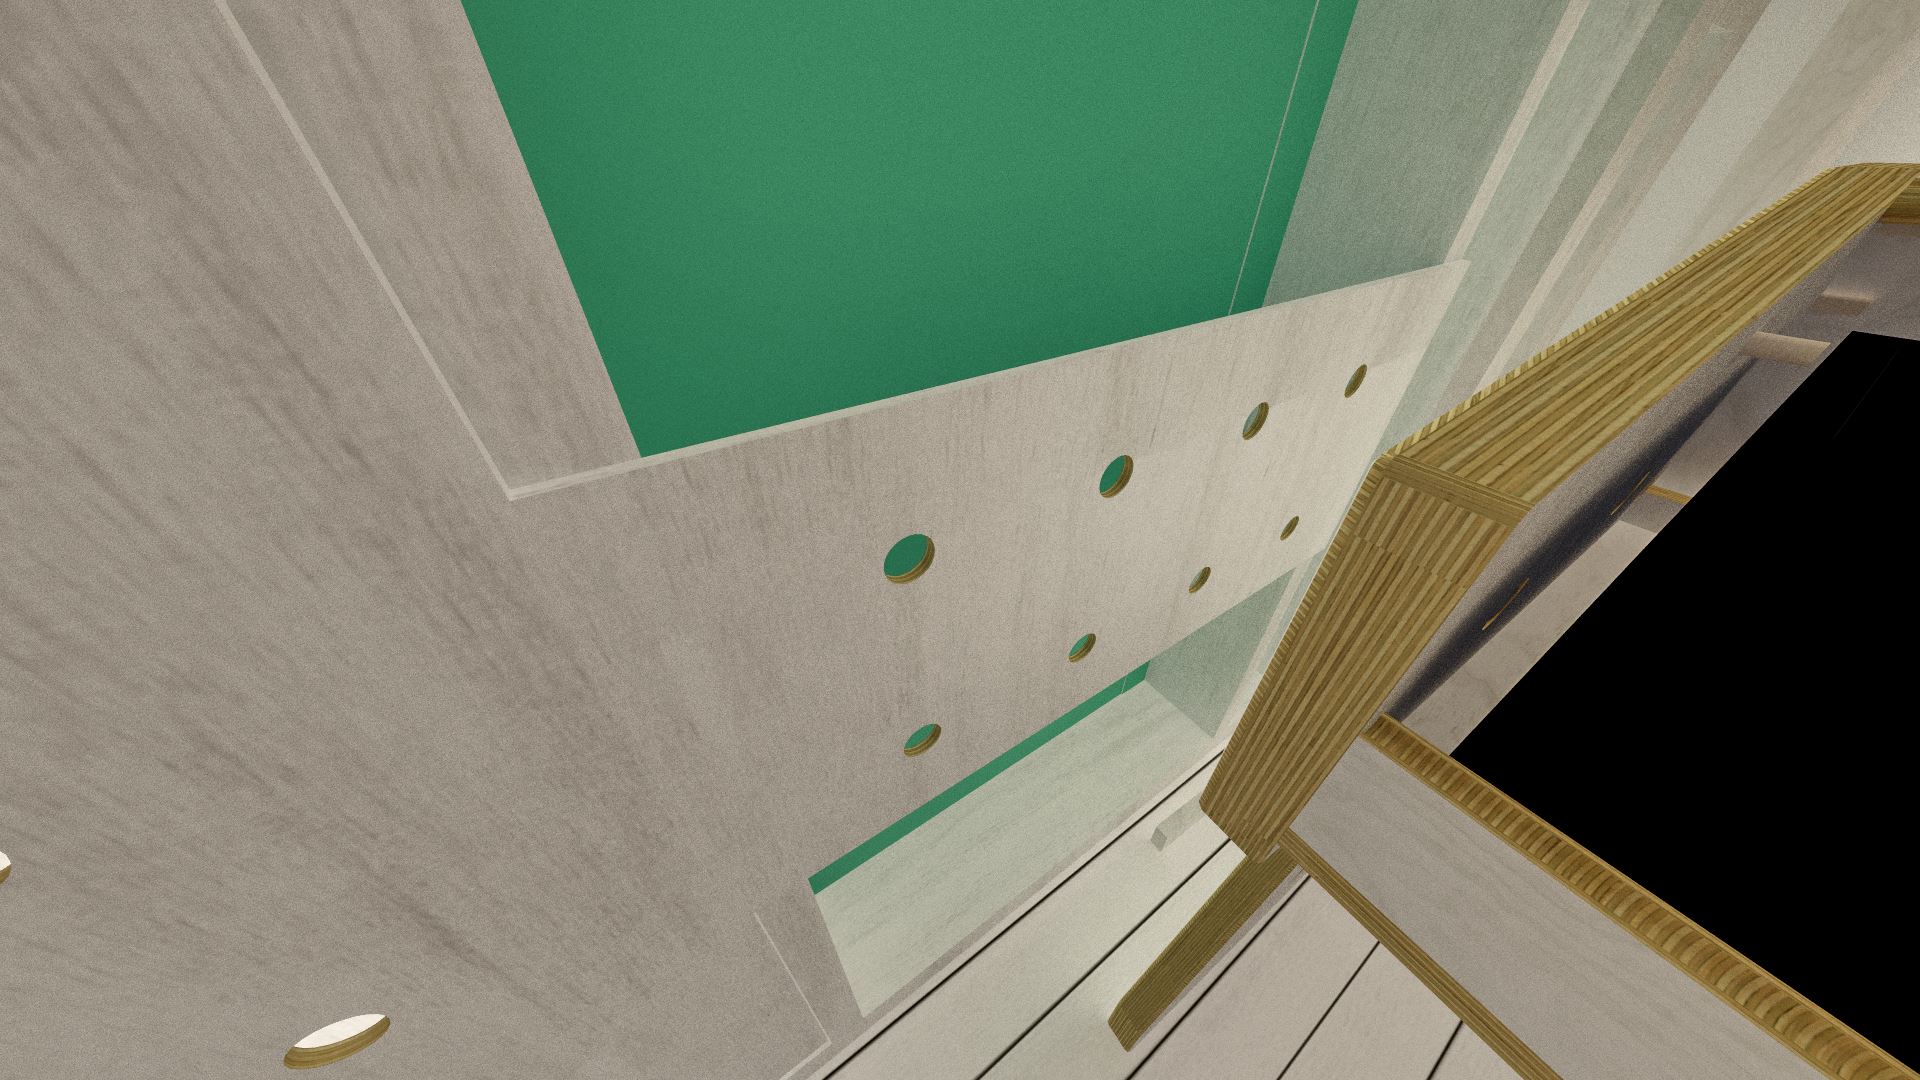
The holes in the storage wall are not just an aesthetic thing, but they also serve a purpose; again, it's a case of absorbing some of the sound from the speakers. The holes allow some of the sound through the flat surface, instead of a wall of reflection that would produce weird first-order reverberation.
Despite losing some floor space, it makes total sense to use as much vertical space, and custom built furniture as possible when designing for small rooms. If you really wanted to make this wall that bit more special, it would be cheap and easy to install RGB LED lighting behind these panels.
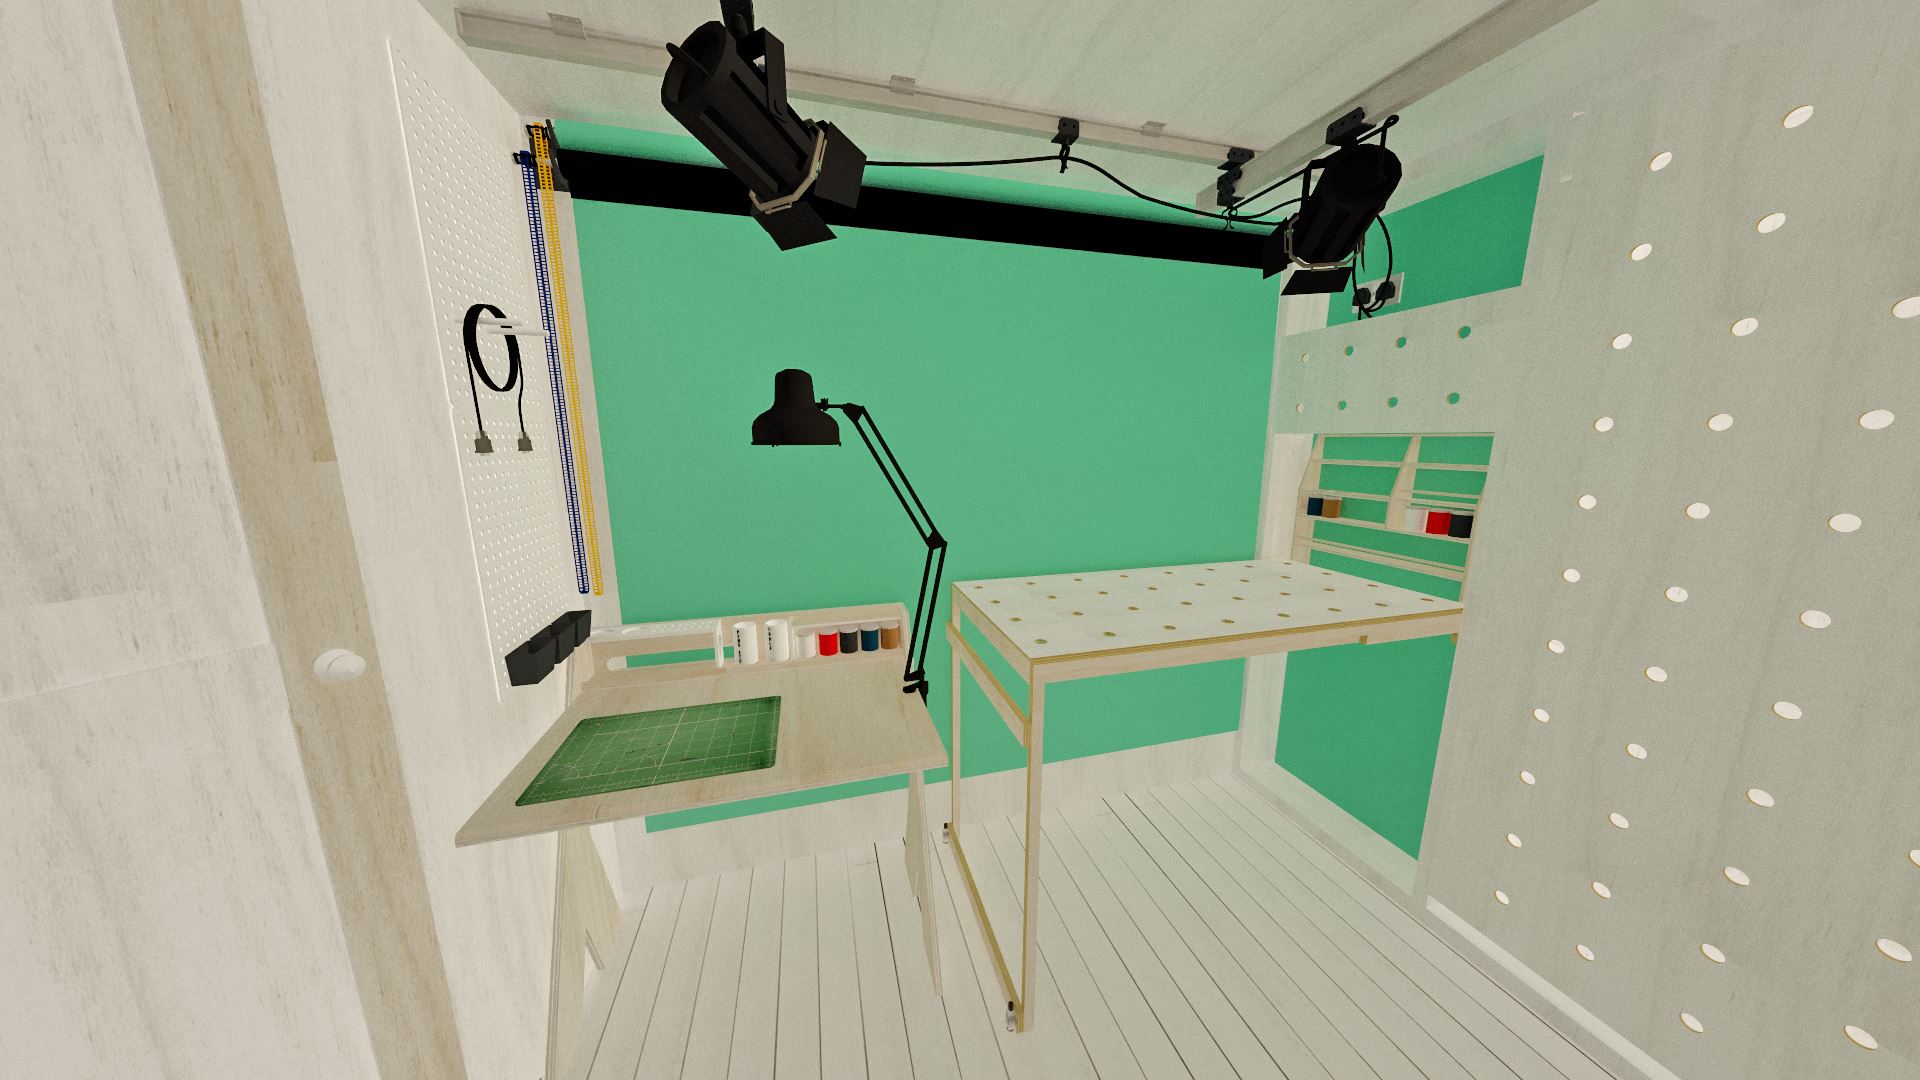
A final look at the model-making area. You could use the overhead gantry lights instead of the clamp-on light, but I figured that something a bit closer to hand would be useful when modelmaking, and you won't want to be working under hot studio lights all day!
FINAL THOUGHTS:
All in all, I'm really happy with how the studio space has turned out. It took a lot of head-scratching trying to work out exactly how to use the small space efficiently, and the design changed quite a few times; in fact, I had already finished writing this up and doing all the renders when I had to redo everything! That said, it was worth it because the end result is pretty much exactly what I need, and despite the tiny space, I can fit in pretty much everything required. The new insulated walls, ceiling, and floor will help warm this room up; sorely needed for a single skin brick building!

It probably goes without saying that I'd love to commandeer the whole garage, and even have a small kitchenette and wetroom, but that sadly isn't an option. Despite this, the folding furniture, composer's desk, and lighting gantry will do much to improve my productivity. It'll be absolutely great to have a space that I can be proud of, and more importantly, get a bit of peace and quiet in, and not be living in fear of disturbing people. And with more and more commissions coming in, it's about time that I had somewhere with good lighting and a permanent space to set up my model-making stuff.

As always, I appreciate any and all feedback and comments; feel free to use any of the buttons along the bottom of any page to contact me with them! 'Till next time,

Jam
Pulling one of the coloured chains on the left drops down the corresponding vinyl or paper background. You can see here that I've got a greenscreen pulled down; which is ideal for when you want to add a background in when it comes to editing videos/photos.